
A door that sticks or won’t latch usually isn’t “a bad door.” It’s alignment. I’ve handled installs in villas with tall, heavy slabs, tight office corridors, and older houses with settled frames—the same few checks fix most issues.
In this guide, you’ll learn how to get a straight frame, even gaps, a smooth swing, and a lock that closes without forcing it. This Wooden Door Installation walkthrough is for DIYers and intermediate homeowners. Plan 2–4 hours for most interior swaps and 3–6 hours for exterior work (weather seals take time). Difficulty: moderate—careful work, not hard math.
Tools & Materials You’ll Need
Keep these close for any Wooden Door Installation. On site, I lay them out in the order I’ll use them—classic Wooden Door Installation discipline:
- Tape measure, 4–6 ft level, square, pencil
- Drill/driver + bits, countersink bit, screws
- Shims, utility knife, pry bar
- Wood filler, sandpaper (120–220), touch-up paint/stain
- Hinges, latch/lockset, strike plate
- Optional: chisel/hammer, planer, clamps
Before You Start: Measurements That Prevent Rework
Most redo jobs come from skipping prep. This is the Wooden Door Installation step that saves your weekend.
- Door size vs opening: Measure width/height in 3 spots. Don’t assume it’s consistent.
- Plumb/level/square: Check both jambs for plumb and the head for level. If the frame is leaning, the door will drift or rub.
- Hinge side + swing direction: Stand where you’ll use the door. Choose swing based on furniture flow and hallway space.
- Pre-finished vs unfinished:
Step-by-Step Wooden Door Installation
Follow this order. It keeps the work clean and predictable, whether you’re doing interior wooden door installation or an exterior entry.
H3: Step 1 — Remove the Old Door (if replacing)
For a replacement Wooden Door Installation:
- Support the slab, tap out hinge pins, lift the door off.
- Remove damaged trim only if you need better access for shims or repairs.
H3: Step 2 — Prep the Frame
A straight frame is your foundation.
- Scrape paint bumps and debris where hinges sit.
- Repair cracked jamb edges; tighten loose jamb screws.
- Sight down the jambs for bowing. If they’re bowed, plan extra shims.
H3: Step 3 — Position Shims for a Straight Install
Shims control the final geometry in wooden door fitting.
- Shim behind each hinge location (top/middle/bottom).
- Shim the latch side near the strike area and near the bottom.
- Keep the hinge-side jamb perfectly plumb with your level—this controls the swing.
- Trim shim ends flush so casing sits flat later.
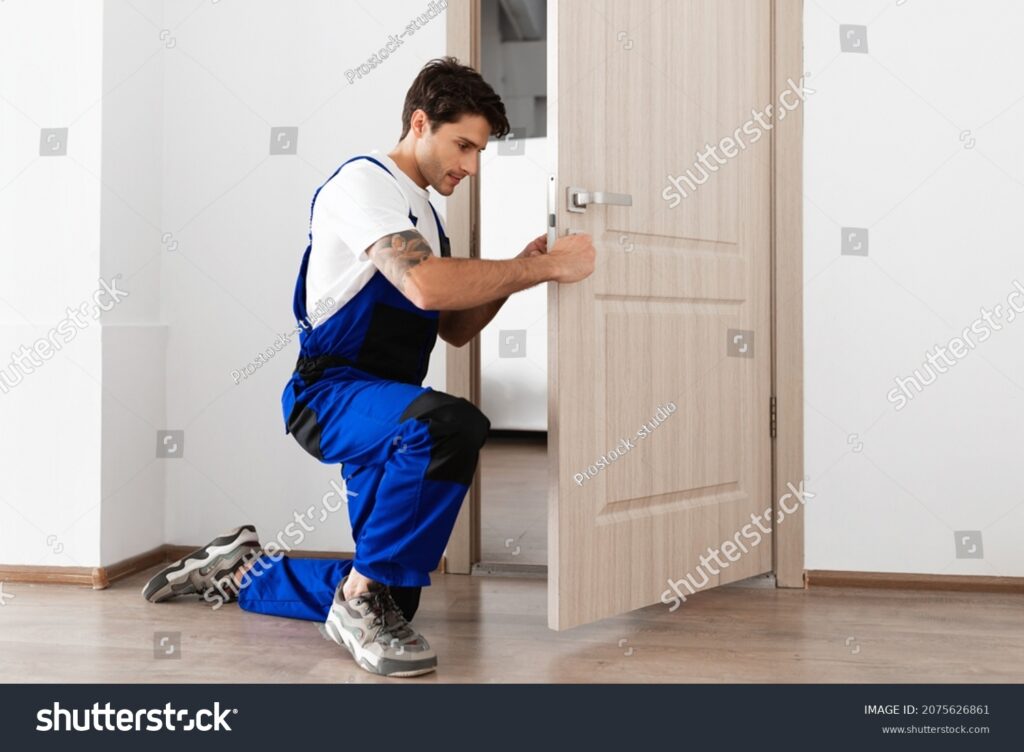
H3: Step 4 — Mark and Install Hinges
- Match hinge locations to the existing jamb (or standard layout).
- Mark the hinge outline with a knife for crisp edges.
- Mortise to hinge-leaf depth so the hinge sits flush. A proud hinge causes binding.
H3: Step 5 — Hang the Door and Test the Swing
- Hang the slab with temporary screws (one per hinge).
- Close the door slowly and check the reveal (gap) at the top and hinge side.
- Open halfway and let go. If it moves by itself, your hinge jamb isn’t plumb yet.
- For exterior wooden door installation, also check sweep/threshold contact: snug, not dragging.
H3: Step 6 — Align Gaps and Stop Door Rubbing
Common reveal fixes:
- Tight at top latch corner: Add a thin shim behind the top hinge or bring the hinge jamb to plumb.
- Tight on latch side: Shim the latch jamb back, or deepen hinge mortises slightly if the slab is being pushed over.
- Uneven gap at head: Level the head jamb first, then fine-tune hinge shims.
- If the slab is slightly wide, plane a little, sand, and reseal the edge. This part of Wooden Door Installation is slow, but it’s where “no sticking” happens.
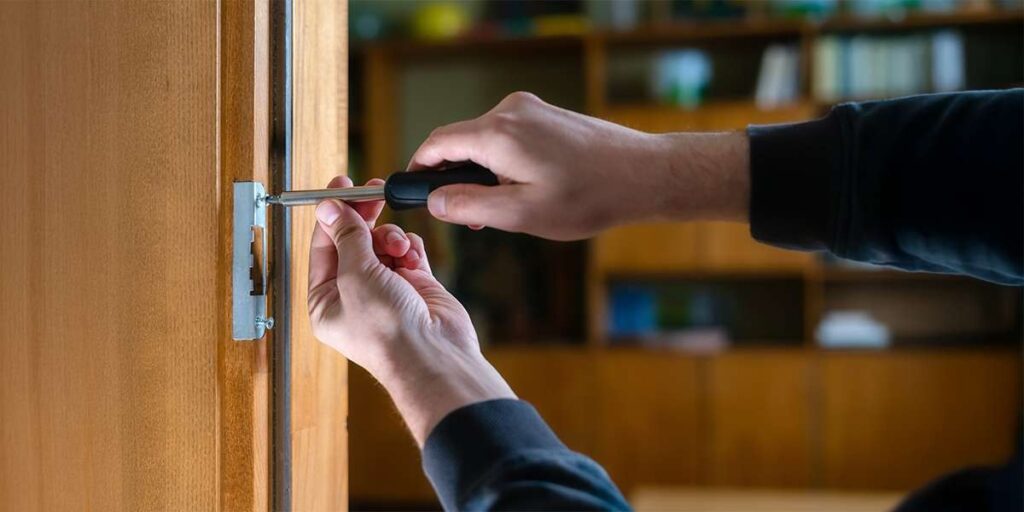
H3: Step 7 — Install the Handle, Latch, and Strike Plate
Only install hardware after the swing is right.
- Install the latch/handle.
- Close the door and mark where the latch meets the jamb.
- Position the strike so the latch slides in cleanly without lifting the door.
H3: Step 8 — Final Tightening, Finishing Touches
- Replace one top-hinge screw with a 3-inch screw so it bites into framing for better holding power.
- Add remaining hinge screws, recheck swing, then fill/sand touch-ups.
- Reinstall trim and caulk lightly for a clean line.
That’s the core Wooden Door Installation process. Repeat the checks door-by-door; openings vary more than people expect.
Common Wooden Door Installation Problems (Fast Fixes)
- Door won’t close / hits frame: Recheck hinge jamb plumb. Adjust shims before you touch the slab.
- Uneven gaps: Shift shims behind hinges (that “steers” the door) and confirm the head jamb is level.
- Door swings open/closed by itself: Hinge jamb is out of plumb. Fix that and the swing settles.
- Latch doesn’t catch: Move the strike slightly or deepen the strike mortise so the latch fully enters.
- Squeaky hinges: Pull the pin, wipe it, add a small lubricant, reinstall.
When I troubleshoot, I start with plumb every time—most Wooden Door Installation issues trace back to it.

Pro Tips for a Clean, Premium Result
- Use a level and square at every step. Don’t “eyeball” jambs.
- Pre-drill into hardwood to avoid splitting.
- Use a long screw in the top hinge for strength on heavy doors and high-traffic office entries.
- Seal all sides of any door exposed to humidity (top, bottom, and edges). Better sealing supports tighter air-leakage goals.
- If the opening is old or out of square, a pre-hung unit is often faster and more forgiving than slab-only work.
Cost, Time, and DIY vs Hiring a Pro
Typical time:
- DIY interior: 2–4 hours
- DIY exterior: 3–6+ hours
- Pro install (typical): 1–3 hours interior, 2–4 hours exterior (assuming the frame is healthy)
What affects cost the most:
- Frame repairs (rot, bowed jambs, out-of-square openings)
- Hardware upgrades (premium hinges, smart locks, heavy-duty latches)
- Finishing (stain/paint, sealing edges)
- Exterior performance add-ons (threshold, weather-stripping)
If you’re fitting multiple doors in a villa or office, treat each opening as its own Wooden Door Installation—floors and walls are rarely identical.
FAQs
Can I install a wooden door without replacing the frame?
Yes, if the frame is solid and close to square. If it’s badly twisted or rotted, a pre-hung unit is usually the smarter move.
How much gap should there be around a door?
Many installers aim for about 1/8 inch on the sides and top. Bottom gap depends on flooring and (for exterior) the threshold and sweep.
Do I need 2 or 3 hinges?
Most standard doors use 3 hinges. Heavy doors (solid-core, tall slabs, exterior) should use 3 (or more) for stability.
How do I fix a door that rubs after installation?
Find the rub point, then adjust shims behind hinges or the latch jamb. Plane the slab only after the frame is straight.